

To Record
- Open Hindenburg
- Go to the “File” menu and select “New.” (You can also select “New” from the top toolbar.)
- Ensure each track is assigned a microphone input. The microphones are each labeled with a number on the front, starting at the iMac and going counter-clockwise.
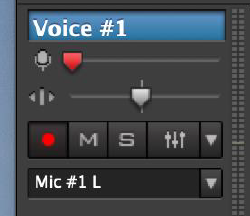
- Assign the first track “Mic #1 L”
- Assign the second track “Mic #2 L”
- Assign the third track “Mic #3 L”
- Assign the third track “Mic #4 L”
- Enable the tracks you want to record by clicking the small red circle above the name of the microphone. (The image indicates the track is enabled.)
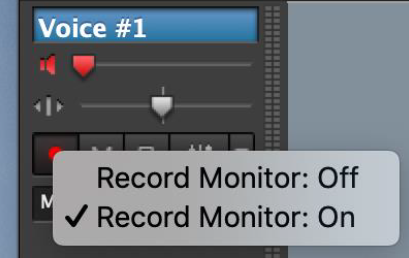
- Enable live monitoring of the audio by holding down the “control” key and clicking on the red track enable button. Select “Record Monitor: On.” This will allow you to hear what the microphone is detecting through the headphones attached to the iMac. Do this for each of the enabled tracks.
- Tip: Enabling the M or S will effect playback.
- M will mute the track during playback
- S will solo the track, it will be the only track heard
- The microphones will have a steady red light to record. This light will blink if it’s muted.
- Save your work by selecting “Save” under the File menu.

- Have each person you are recording speak into a microphone while you adjust their voice volume. Do this by checking sound levels in the scale on the left track bar. Aim to keep each person’s volume in the upper blue and yellow range. Adjust the volume using the “Gain” knob on the back of the microphone.
- Tip: Do not change the other knob on the back of the microphone, it should be set to Cardoid for voice recording.
- To record, click the flashing red “record” button on the bottom of the window. (The red flashing circle.)
- To pause, press the spacebar. Continue recording by clicking the record button again.
- Click stop (the white square) or press the spacebar when finished. Hindenburg will automatically adjust the volume levels of the track to the preset international sound standard.
- Save your work.
To Edit:
- If you are working with an existing audio file, import it by selecting “Import” from the toolbar at the top of the screen. You can also drag audio in from your Finder or desktop. This may be useful in incorporating sound you recorded using a smartphone or field recorder.
- Remember to save regularly as you edit.
- Click and drag audio into its desired sequences across multiple tracks.
- To cut audio out of a track, drag the cursor over the desired segment of a track to select it and select cut in the Edit menu (or click Cmd-x).
- Here are other helpful keyboard shortcuts for editing in Hindenburg on Hindenburg’s Website
- Hindenburg also provides several helpful video tutorials on editing, including how to record a conversation with someone via Skype or Google Hangouts, how to incorporate music into your recording, and more: https://hindenburg.com/support/tutorials
- To export, select “File” and “Export” and select your preferred file format (mp3, wav, etc.).
Hindenburg Audio Recording in LITC 122