Welcome to a short introduction to Adobe Premiere Pro. Adobe Premiere Pro is one of many programs of Creative Cloud offered by Adobe. It is a timeline-based and non-linear video editing software application. It can be accessed on Windows, Mac, and mobilizing devices. Adobe Premiere Pro can allow you to edit a video in different dimensions starting from trimming, adding text, adding music, combining, and many more options. This is to get you started, Enjoy!

Part I: How to Create a New Project in Premiere Pro
This section covers how to create a new project and close a project in Adobe Premiere Pro
Steps:
- Double click on the Adobe Premiere Pro Icon on your desktop
- To create a new project, click New Project on the start screen. Name your project.
- Under “Location” use the “Browse” button to choose a location on your laptop of where you want to store your project and click Create.
- Import media files into your project using:
- Option1: On the top left bar, select “Import”. Locate where your file to import is, and then select a media file you want to import. and then click “Import’ button
- Option2: in the “Media Browser” panel Find the files you would like to import, select the file, and then drag and drop to the timeline bar.
- Once the media is imported, you are ready to edit in Premiere Pro timeline bar.
- As you edit, be sure to save your work (choose File > Save) periodically or CTRL + S (on PC) / CMD + S (on Mac).
- To close your project, choose File > Close Project.
Part II. How to Open an Existing Project in Adobe Premiere Pro
This section covers how to open an existing project from your laptop/desktop in Adobe Premiere Pro.
Option 1:
- Locate where the project is located (go to the folder on your laptop where the project is saved).
- Double click on the Adobe Premiere Pro project (with extension. prproj )to open the file.
Option 2:
- Open Adobe Premiere Pro application from your desktop.
- To open an existing project, click “Open Project” button.
- Browse to where the project is located, and then select the file.
- Choose “Open’ button to open the project.
Part III. How to Trim Videos Using Adobe Premiere Pro
This section covers how to trim (adjust the start or end) or cut or remove undesirable parts of a video clip in Adobe Premiere Pro.
NOTE: First import the video in your timeline in Adobe Premiere Pro
Trim the beginning or end of the video:
- Click on the Selection Tool or press ‘V’ on your keyboard to activate Selection Tool
- Set your time marker where you want to trim to.
- Click and drag the clip sequence till the beginning of your Trim Marker. You can do the same from the start or the end of the video.
- Drag your clip back to the beginning of your timeline
Cut a part of the video in the middle of the clip:
- Click on the Razor Tool or press ‘C’ on your keyboard to activate the Razor Tool
- You can make multiple cuts from the middle of your clip
- Re select the Selection Tool and you can adjust the ends of the clips by dragging its end of the start.
- You can delete undesired clip by selecting the clip and then hit delete button on your keyboard.
- You can recombine the remaining clips by dragging the two clips together.
Part IV. How to Add Music / Sound to a Video using Adobe Premiere Pro
This section covers how to add music or different sounds to a video in Adobe Premiere Pro.
- Double click to the project panel or click “Import” from the top left bar to open the import window
- Find the music you want to import, and select “Open”
- Drag the audio clip onto a track below video clip
- Use the Razor tool to cut the end of the music clip as the same end as the video clip
- Use Selection tool, click on the rest of the music clip you don’t need, and press “delete” button
- Save and export the video once done
Part V. How to Join Two Video Clips Together
This section covers how to combine two or more separate video clips together to create a video in Adobe Premiere Pro.
Note: Combining Video clips in Premiere Pro is called creating a nested sequence
- Open Adobe Premiere Pro and create a new project. Click on the File menu from the menu bar and select New.
- Now import the videos you want to combine. Click on the File menu in the menu bar and select Import.
- Option One:
- Once you have imported the videos you want to merge, they will appear in the Project panel. Now drag and drop the videos onto the timeline.
- Option Two:
- Drag and drop a new video from your desktop (location of the video) directly to the timeline
- Then select the two videos you want to combine. Press and hold the shift key and click on the two videos to select them.
- Now right-click one of the selected clips and select Nest from the dropdown menu. Regardless of the number of video clips you have selected, you only have to right-click one of the selected clips to activate the dropdown menu.
- In the Nested Sequence Name window, enter a name for your new merged video clip and hit OK.
Now you will notice that the background color has changed to green to indicate that the two videos have been merged.
Part VI. How to Add Text and Titles on a Video using Premiere Pro
This section covers how to add text/caption or a title to a video in Adobe Premiere Pro
Open Premiere to build a new project: Click to open Premiere Pro on Windows or Mac.
- Double click on the left corner library to import media.
- Click File at the top > New > Project.
- Name your project, and then click OK.
- Then drag your desired video file to Premiere Pro timeline.
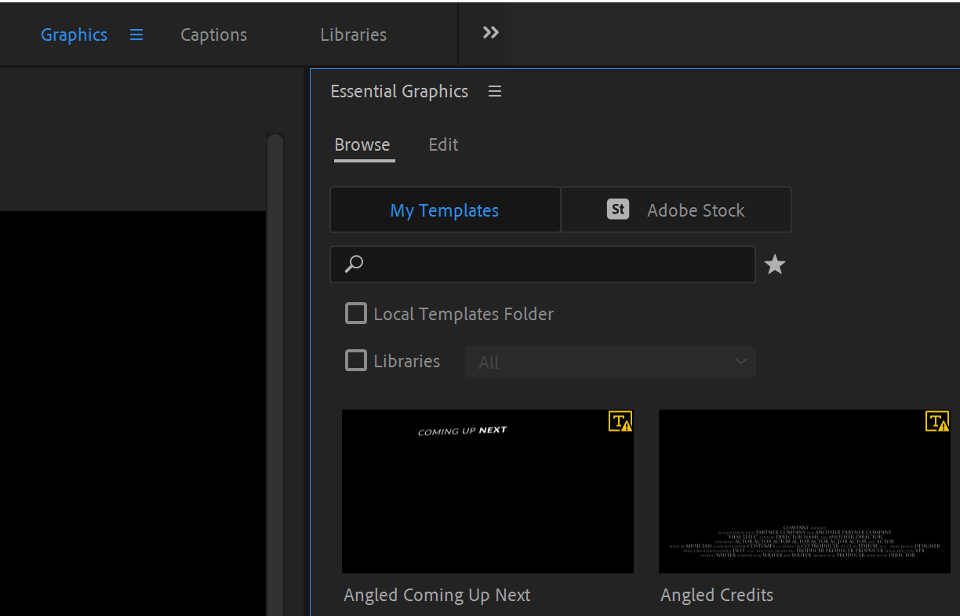
In the top menu bar, select Graphics > Essential Graphics > Browse.
- There will be a lot of different graphics templates to choose from

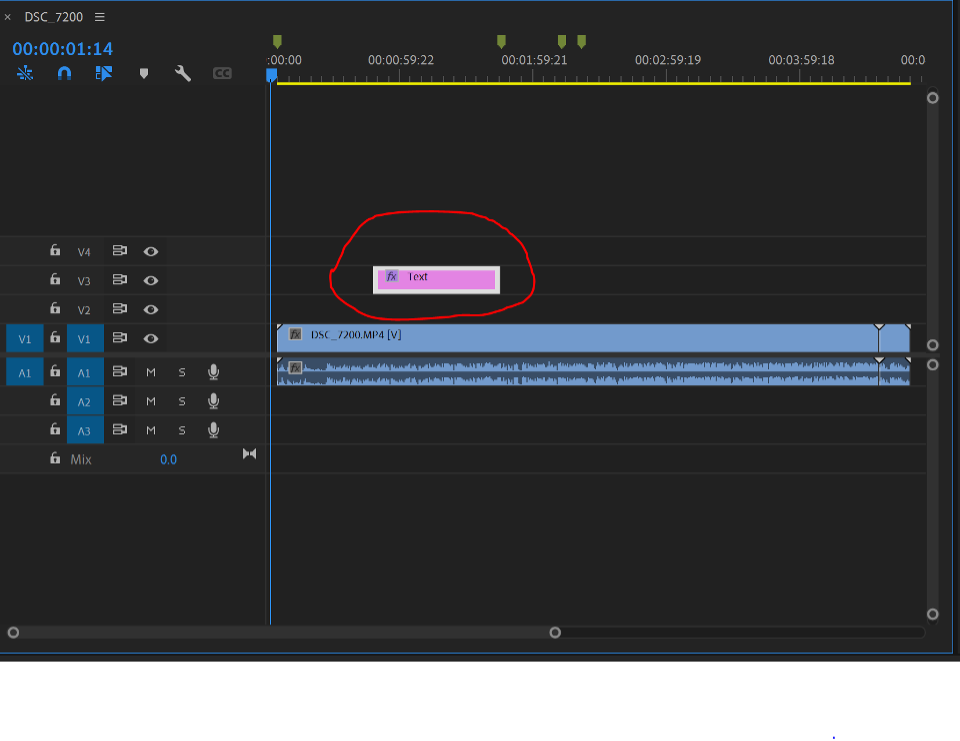
- Select one of the templates, and drag it to the Premiere Timeline.
- You can choose which part of the video you want it to appear during by dragging around on the Premiere Timeline.
- You can choose how long you want the text to appear on the screen by extending the rectangle of the text on the Premiere Timeline.

- To edit the Text: In the top menu bar, select Graphics > Essential Graphics > Edit.
Click on Your Name Here: then you can type your text there, and you can change the text color and other font edits in the same window
Part VII. How to Export a Finished Video from Premiere Pro
This section covers how to export and save a finished project as a video after editing it in Adobe Premiere Pro.
Note: Wait to complete this step until you are done editing the video and ready to export it as an MP4 file.
More information about exporting a video: Can be found here
- Go to File > Export > Media. You can also press the shortcut key Ctrl + M on PC or Cmd + M on Mac.
- Then an Export Settings window will open:
- Select a Format and Codec:
- On “Match Sequence Settings” dialog box, choose
- Choosing Preset format, you have to choose from the dropdown menu based on what you want to use the video for, either YouTube or Vimeo or other formats depending on where you plan to use the video.
- On “Match Sequence Settings” dialog box, choose
- Fine tune your settings and adjust your Bitrate:
- Click on output name to specify the output name for the exported video file
- Ensure that Export Video and Export Audio are checked, so that the file has both video and audio
- Select a Format and Codec:
- Now you can select one of two Premiere Pro export options: Queue or Export: Select Export to finish in Premiere, or Queue which will send you to Media Encoder, and you can add the sequence to a queue.
