How to make a Timeline with Timeline JS
Timeline JS is an open-source tool that enables anyone to build visually rich, interactive timelines. Beginners can create a timeline using nothing more than a Google spreadsheet. More experienced makers can use json to customize timelines while keeping its core functionality.
Timelines can integrate text with images, maps, videos, websites, etc.
You can see Timeline JS at work in these sample Timelines:
- Bulger on Trial (WBUR)
- Revolutionary User Interfaces (Knight Lab)
Timeline JS in the Classroom:
Why you might use Timeline JS to Teach:
- Timeline can integrate images, text, websites, and more to clearly communicate concepts and stories.
- Timeline JS can present information chronologically or can be used to create non-chronological narratives in the form of storybooks or virtual museums.
Why Students Might Benefit from Making a Timeline in class/as an assignment:
- Students can practice constructing coherent narratives with diverse source bases
- Timeline JS provides students with a visually-appealing way to present chronological information.
- Students may also use Timeline JS to create a digital story or experiment with non-chronological forms (virtual museums, etc.)
- Creating a public-facing project compels students to invest in a project that may reach a broader audience and creates conversations about curating research for various public(s).
How to make a Timeline:
You’ll need:
- A google account
- A rough outline of your timeline with dates, brief text, and sources (images, maps, video, etc.) Knight Lab recommends users limit their timelines to approximately 20 slides to not overwhelm viewers.
- See this resource guide on supported media types for guidance. [Note: Timeline JS does not like pdfs]
Let’s Begin:
- Start at the Timeline JS page on the Knight Lab site.

- Click “Make a Timeline” on the main site
- Click “Get the spreadsheet template.” Timeline JS will require you to make a copy of their Google spreadsheet to proceed.
- Click “make a copy”
- The spreadsheet will appear with sample information. Highlight these cells and click “delete.” Do not delete row 1 which includes headings you will need to organize your timeline (Year, Month, Day, . . . Headline, Text, etc.).

- Understand categories and plan your timeline:
- The first row in blue represents the title page of your timeline and need not have an associated date.
- Year/Month/Date/Time represent boxes to input the dates of events.
- The “Display Date” heading represents the date as you would like to appear. For example if you enter the date in the Year/Month/Date headings as 2006/1/1 but would like the date to appear on your slide as “January 1st, 2006” enter it as such in the “Display Date.” Text entered in the “Display Date” will supersede any dates entered in the Year/Month/Date/Categories.
- “Display Date” is also the heading where users can enter “Page 1” or other organizing terms to use Timeline to make a non-chronological story.

- Under media, you can add Google Maps, URLs [ Flickr, Instagram, Spotify, Twitter, Vimeo, YouTube, Wikipedia], etc.
- To find images that comply with usage rights, do a google image search for a desired subject. When the search produces results, click “Tools” and then “Usage Rights” in the toolbar to filter for images labelled for reuse.
- To streamline the process of adding images, you can right click on an image, and select “copy image address” and add that to the related box. Be sure to credit the image source in the “Media Credit” box.
- When you’ve completed your entries, select “File” and then “Publish to the Web.”

- In the next window, change the menu that reads “entire document” to “od1.” Then, click the blue “publish” button. When asked, “Are you sure…?” click OK. Ignore the URL that appears in the center of the window. Just close the window using the X in the top right corner.
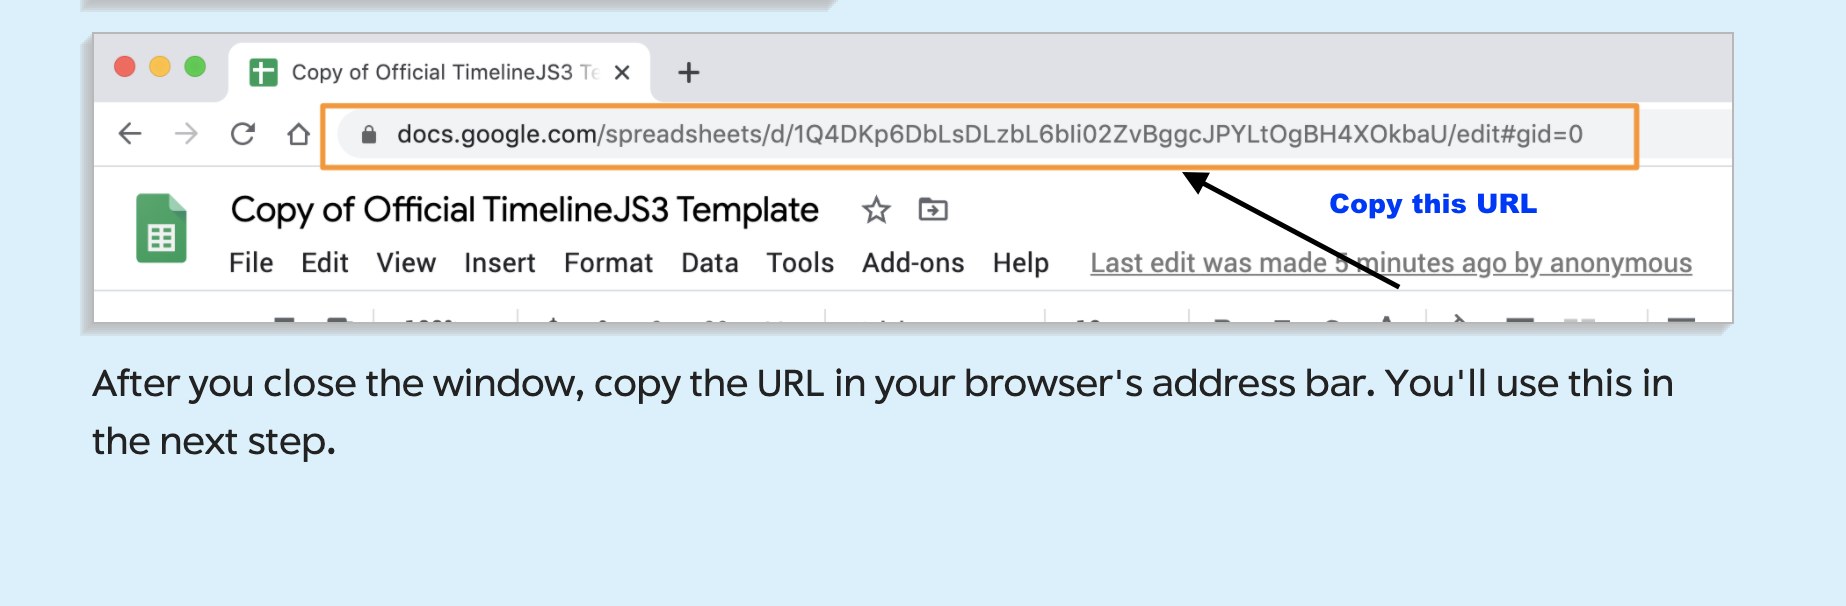
- After you close the window, copy the URL in your browser’s address bar. You’ll use this in the next step.
- Return to the Timeline page and proceed to Step 3, “Generate Your Timeline.” Paste your URL into the box labelled “Google Spreadsheet URL.”
- Scroll down to Step 4 and select “Preview” to see you Timeline. You will find the link and embed code to share your work there.
To see these instruction in practice, check out this video tutorial from Knight Lab.
Sample In-Class Practice Assignments:
- Practice Making a Chronological Timeline: Histories of Trinity College
Possible Source Materials:
- Stories from the Summit (Selected Stories):
- embed instead of using links
- Wikicommons: (Find reusable images here)
Sample Timeline with this theme: Women at the Summit: 50 Years of Coeducation
- Spreadsheet for this timeline available to view here.
2. Practice Making a Timeline Story, or non-chronological story (Storybooks, Virtual Museums, etc.):
Topic: Curated Art Exhibit
Possible Source Materials:
- Image Collection – Library of Congress, Washington DC
- Open Access Collections – Metropolitan Museum of Art
- Images – New York Public Library
- Digitized Images – Smithsonian Institute
- Archival Images – Wellcome Collection
Sample timeline with this theme: Slavery and Art Museums
- Spreadsheet for this timeline available to view here.
Further Resources:
- You can access Timeline Resources here.
- Review supported media types.
- Tips on evaluating internet resources.
- Guidance on the ethics of digital storytelling and ant/post-colonial digital humanities:
- Ashley Caranto Morford and Arun Jacob. De-/Anti-/Post-Colonial DH Workshop. Digital Humanities Summer Institute, June 10, 2019.
- On Copyright: Jessica Martinez. Know Your Copyrights: A Review of Copyright and Fair Use for Digital Projects. May 5, 2017.
- Open access does not mean fair and ethical use.
- When in doubt, ask.