Getting Started with Skype for Business at Trinity
For login issues, read Logging in to Skype for Business on mobile/mac.
This post explains how to get started using Skype for Business at Trinity College. At the bottom of the post you’ll find four additional resources: a PDF of this file; a screencast showing what this looks like at Trinity; the slides from the presentation in July; and some good Lynda.com resources.
Using Skype for Business at Trinity
These instructions assume you do not have Skype for Business installed on your machine. You can also skip down to the ‘how to set up a meeting’ instructions below.
Especially on Windows, Skype for Business (hereafter S4B) is pretty self-installing. However, if you would like someone to install it for you, please put in an Information Services Desk ticket.
How to Install Skype for Business
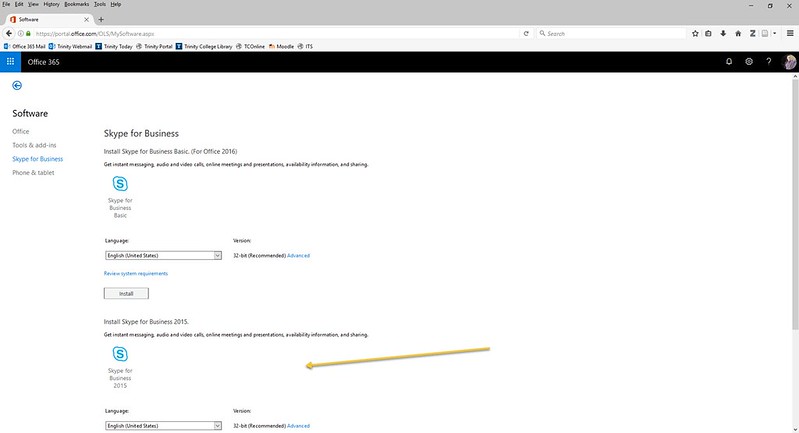
- Go to the url https://portal.office.com/OLS/MySoftware.aspx (or this one, which goes to the same place but which is easier to type: http://bit.ly/TrinSkypeIt will take you to a download page that looks like this:
For some reason, Microsoft assumes you’d like to download all of Office. Unless Office (Outlook, Excel, Word, Powerpoint) is not already on your machine (and you’d like it to be), click the “Skype for Business” link on the left.
That download page looks like this:
You want to install the second, non-basic version. Click Install.
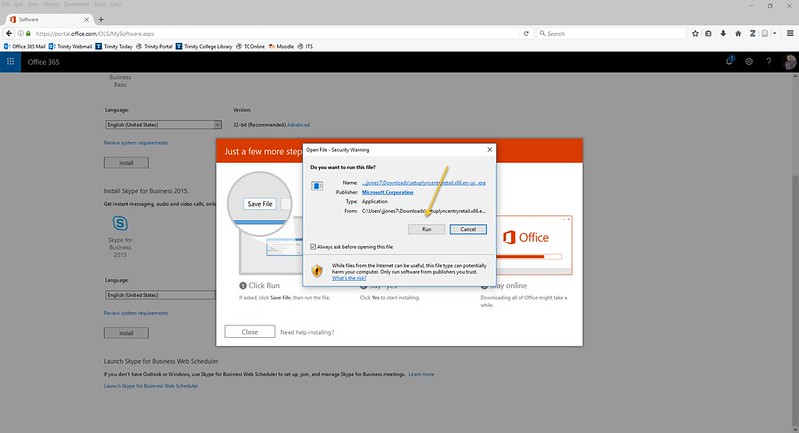
- You get an enhanced install process:

Click “Save File,” and save the file someplace memorable, such as your desktop or the Downloads folder.
Once it’s finished downloading, double-click on the file, and then choose Run from this menu:
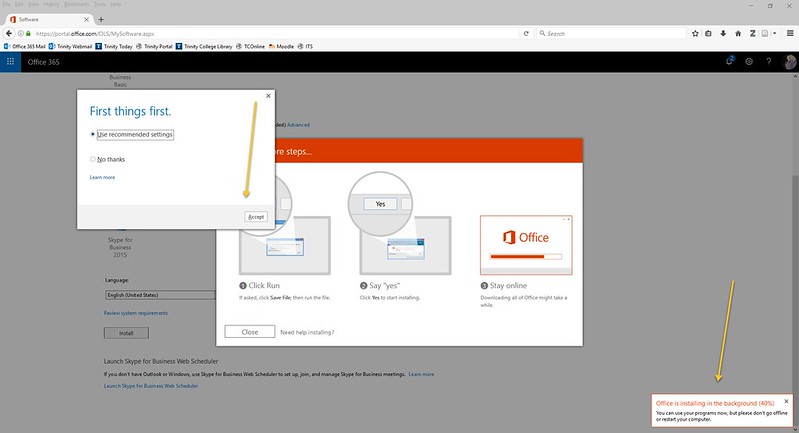
Before it finishes installing, you can get started (this is the “enhanced” part):
As you can see in the right lower corner, it’s still installing. But you should click “Accept” to configure S4B with Recommended settings.
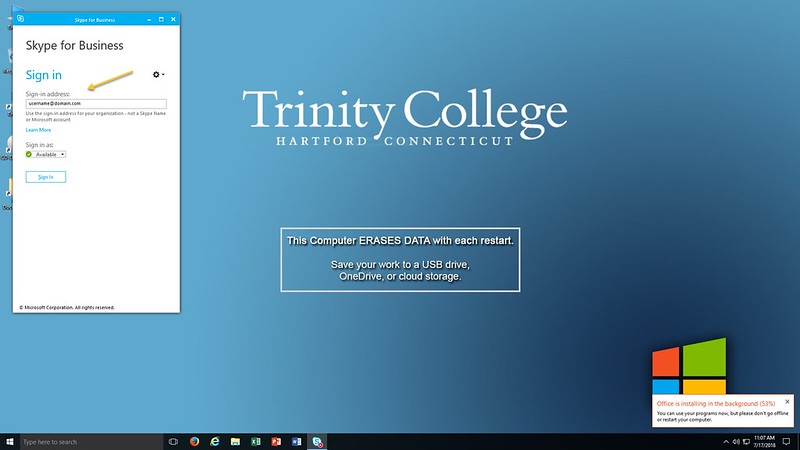
- At this point, if you are not currently signed in to Office365 (which you should be in order to download the file in the first place), it will ask you for your “scoped ID”: username@trincoll.edu . If you *are* signed in, it will already know what your email address is.Not signed in:
Signed in:
Once you see those credentials, it’ll probably ask for a password:
Your regular Trinity password is what it wants.
At this point, S4B is installed, and you can use it immediately to make voice or video calls to anyone on or off campus, or to use it as a chat (instant message) client with people on campus.
How to Set Up Skype for Business Meetings (voice or video) in Outlook
Once Skype for Business is installed, it is easy to create S4B meetings in Outlook.
- From the File menu, select “new meeting”

- Make it a S4B meeting by clicking the “Skype Meeting” button. (Remember: Skype/S4B have nothing to do with each other. This is a confusingly labeled button!)

- You now have a Skype for Business meeting!
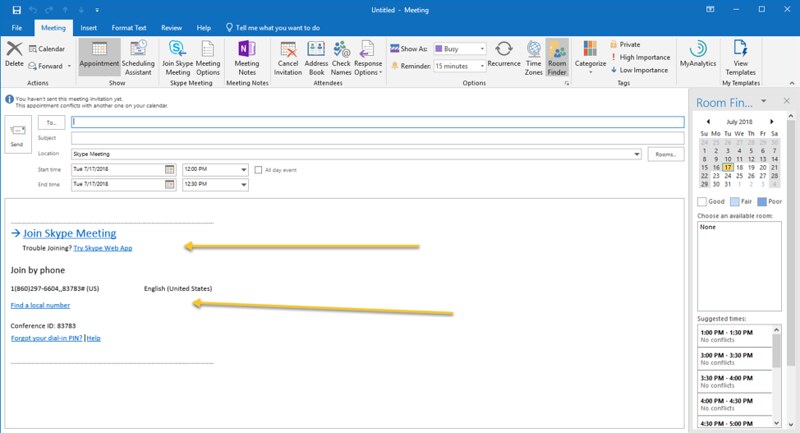
As you can see, the meeting now exists. You can add invitees, change the time/date, etc. People attending the meeting only need either the link (“Join Skype Meeting”) or the phone number and conference ID.
- There are numerous options, accessible by clicking the “Meeting Options”

Options include: tweaks to permissions and to calling in.
The permissions are decently self-explanatory. Note that the defaults are no one waits in the “virtual lobby” and that anyone from Trinity can be the presenter. You can specify the presenter, let people from off-campus present, and more.
Additional resources:
- PDF of these instructions
- Slides from presentation
- Lynda.com resources: Skype for Business Essential Training; If I find a Mac version I’ll link to it
And here is an (audio-free) screencast of the instructions (you might want to watch fullscreen):

